Black Widow Infinity/Civil War Wrist Bites


Black Widow Infinity/Civil War Wrist Bites
Published 2018-04-04T09:44:16+00:00
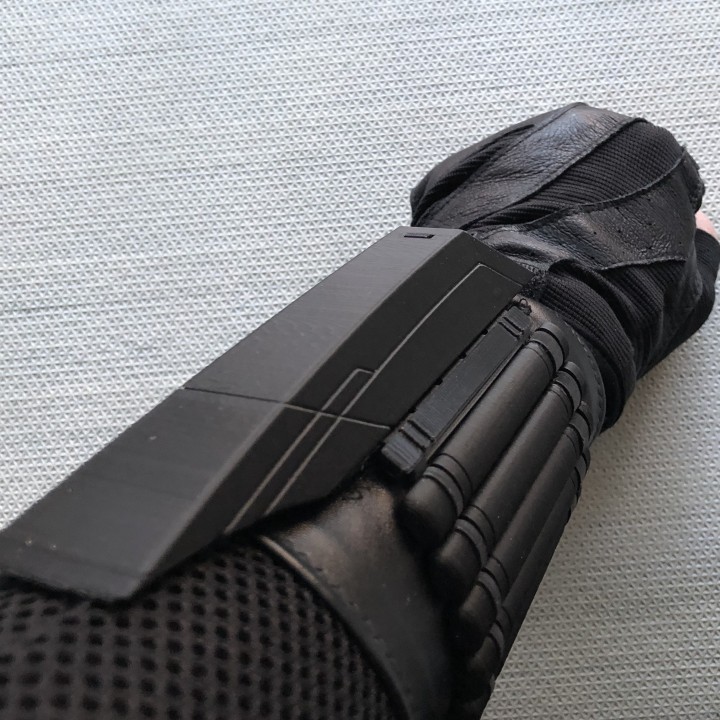
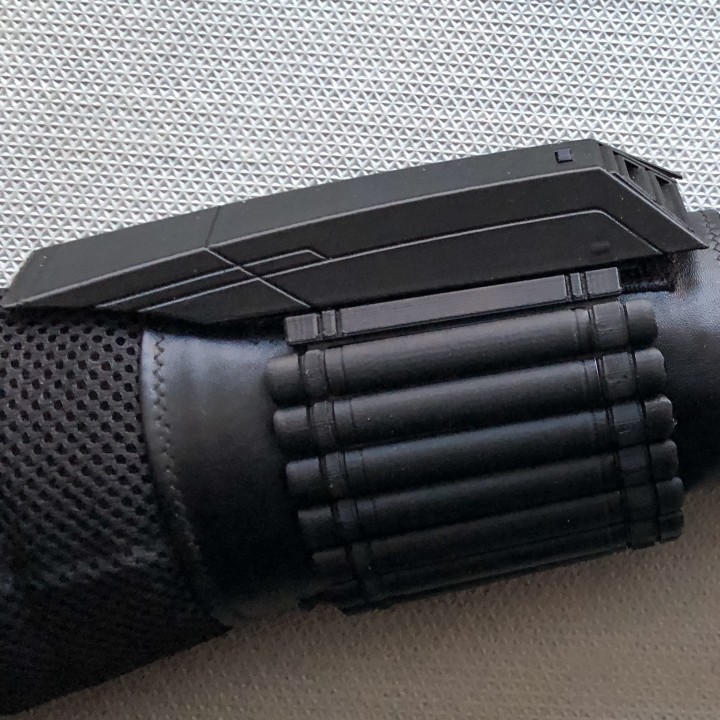
Here's my interpretation of Widow Bites for Black Widow, introduced in Civil War and carried on to Infinity War.
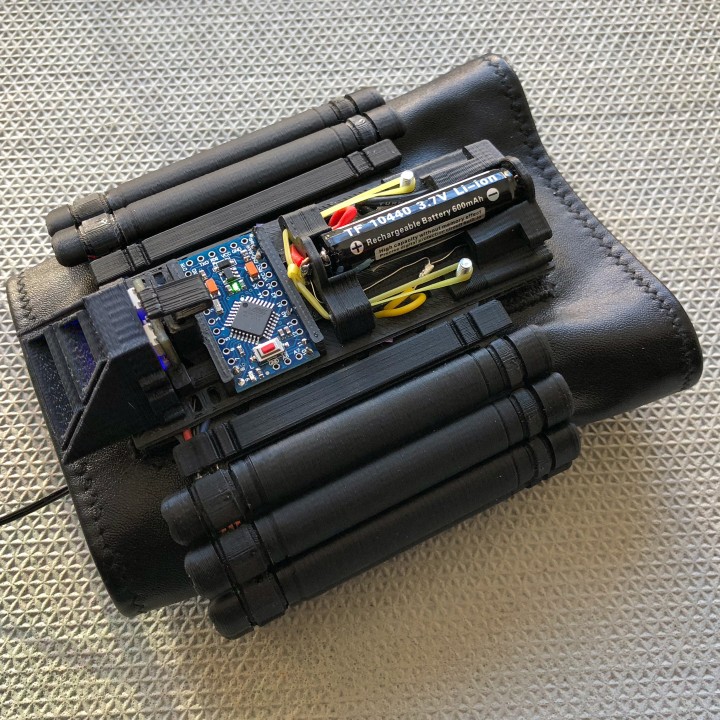
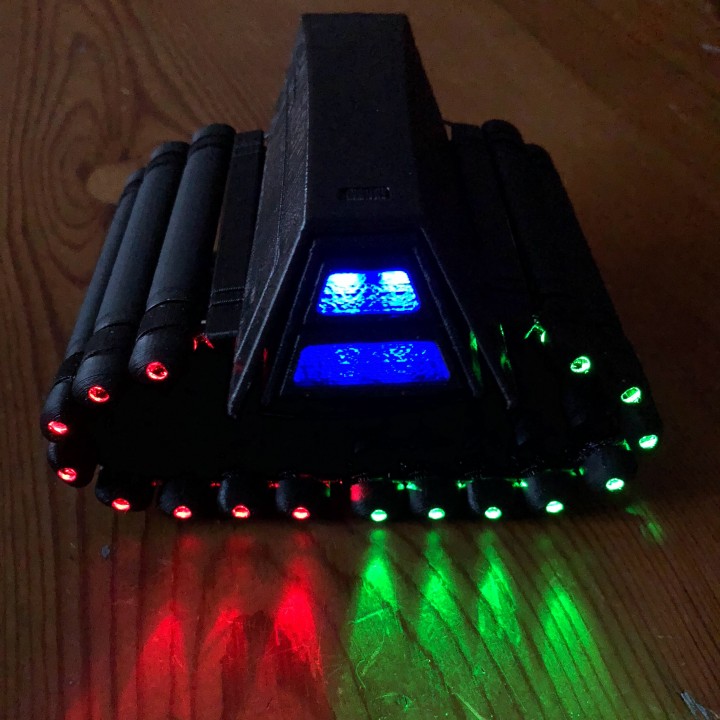
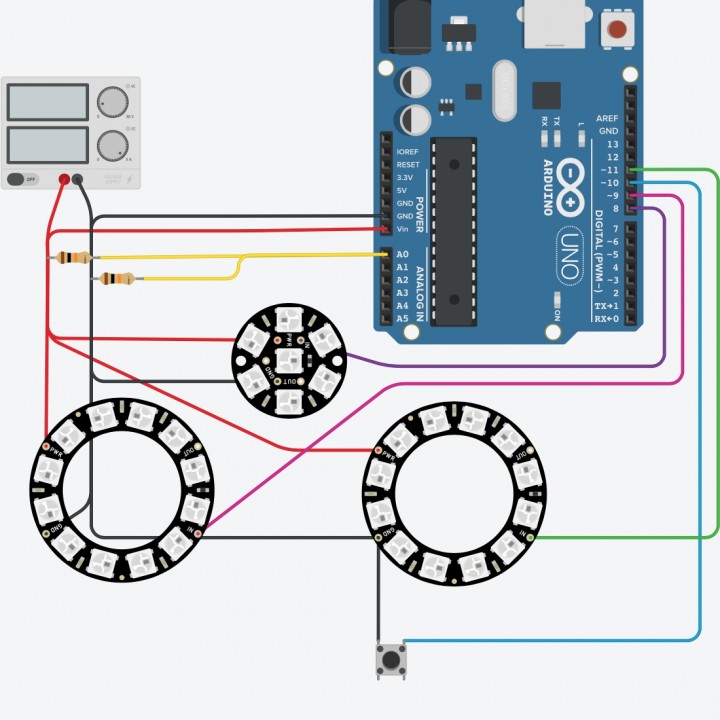
My build includes electronics and I will publish details if there's interest. A 3.3V Arduino Pro Mini is used as a processor. The LEDs in the pods are side-emitting NeoPixels at 90 LEDs/m density. I initially used the strips that Adafruit sells, which come in an 8mm wide silicone sock and are ultra-narrow at about 5mm. 8mm wide strips fit perfectly, but you have to print the correct cap piece. I strongly recommend the cheaper 8mm side LED strips (I can only find one vendor on AliExpress right now, I'll add a link at the bottom). In addition a 2x2 NeoPixel square (with a round hole in the middle) is used in the main box. I'll elaborate on the parts if/when I post the schematic for the electronics.
I don't have the software for this configuration yet and I was just using simple test code that blinked the three separate sections of NeoPixels in red, green and blue.
There's also a microswitch and a small "clicker" type housing that you hide inside your palm to control the Arduino. I'll add that model later on, as it's something I designed two years ago and would like to modify a bit to make it print more easily.
The prints in the photos are unfinished and unpainted, directly from the printer to assembly.
Assembly is with four m3 x 10mm screws and a set of washers. The screw length can be slightly longer or shorter (8mm - 12mm will probably work fine). I used counter-sunk screws, but that's not critical either. No glue is required, but if the tips fit loosely, I recommend a bit of glue to keep them in.
The pod tips are designed to have room for a small glass pearl or Swarowski crystal (3-4 mm diameter) for a bit of extra bling.
Mounting on the wrist is done with Velcro. I used both 38mm and 50mm (1.5" and 2") Velcro. There's a printable piece for the leather bracer pattern that you need to flip over to draw the full size cuff. I used one-way stretch imitation leather.
My version has 8 pods on each side of the main unit, but this depends a lot on how thick the underlying suit is and how large your wrists are. Base strips are included for 7, 8 and 9 pods, allowing combinations from 14 pods to 18 pods. If you need an even smaller version, as for one in the comments and I'll produce it (the whole model is parametric, so I just change a number in Fusion 360 and export the parts).
I had a lot of fun designing this model, trying to make it as functional and professional as possible. Let me know your opinions of the design in the comments and please post photos of your prints.
The license is a non-commercial license, so please get in touch if you wish to make these for someone in exchange for money.
Here's the link for the AliExpress vendor where I bought the 8mm wide side-emitting LED strip. Those are still relatively new at the time of this writing and may be difficult to find. The LED strip that I got is a very good design in that if an inner trace breaks, there are large enough exposed pads on the surface mount LEDs that you may be able to skip over the broken part.
For a while, Mokungit wasn't producing the 90LED/m density, but it seems to be available again, if I'm reading this correctly:
The source code for the circuit is available here: https://github.com/jmunkki/civilbites
Please read my comments in the comment section for slightly more information on the circuit (and possible Q&A and discussion).
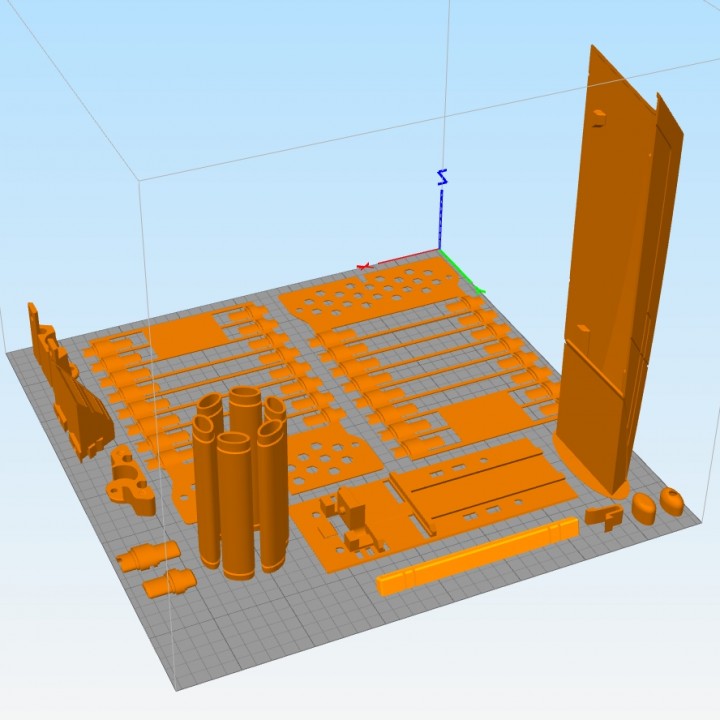
I'm including a screenshot to show the best print orientations for the pieces. You should use custom settings for each piece and not print them all together like that (plus, you'll need far more copies of some of the pieces than what is shown).
When printing the long tubes, it's best to print several of them grouped in a circle and with layer transitions happening as close to the middle of that circle as possible (Simplify3D has a setting for this). You will probably need a bit of a brim to keep them upright. The tubes are probably the most challenging part of the print.
I designed custom support for the outer shell and as you can see, it should also be printed upright for best quality. The support worked extremely well on my printer. I'm including a version of the STL without the support, in case you wish to try something different.
The straps on which the pods are mounted should be printed using a semi-flexible filament. You may be able to get away with non-flexibles, but fitting the bridge part may require cutting some printed parts instead of just flexing them.
There are three versions of the LED cover. The "sticky" version has a tiny bit more extra footprint, which made a world of a difference on my printer. You can use narrow-tipped pliers to remove the excess material. The 8mm version should be used if you use 8 mm wide LED strips (I broke several 5mm strips while building and had zero issues with the 8mm, so I'm going to recommend the 8mm version from now on).
I used PrimaSelect black PLA and Hobbyking's house brand black flexible filament. Here's a referral link to Hobbyking:
| Date published | 04/04/2018 |
| Support Free | YES |
